Configure DynamoDB Table
What is Amazon DynamoDB? Unlike the S3 hard drive used to store files, DynamoDB is a blazing fast Database used to store table-like data. This table will store concise metadata such as: document ID, processing history, amounts, and statuses so the Frontend application can search and display it quickly.
- Access the DynamoDB service: Search for DynamoDB in the AWS toolbar and select the service.
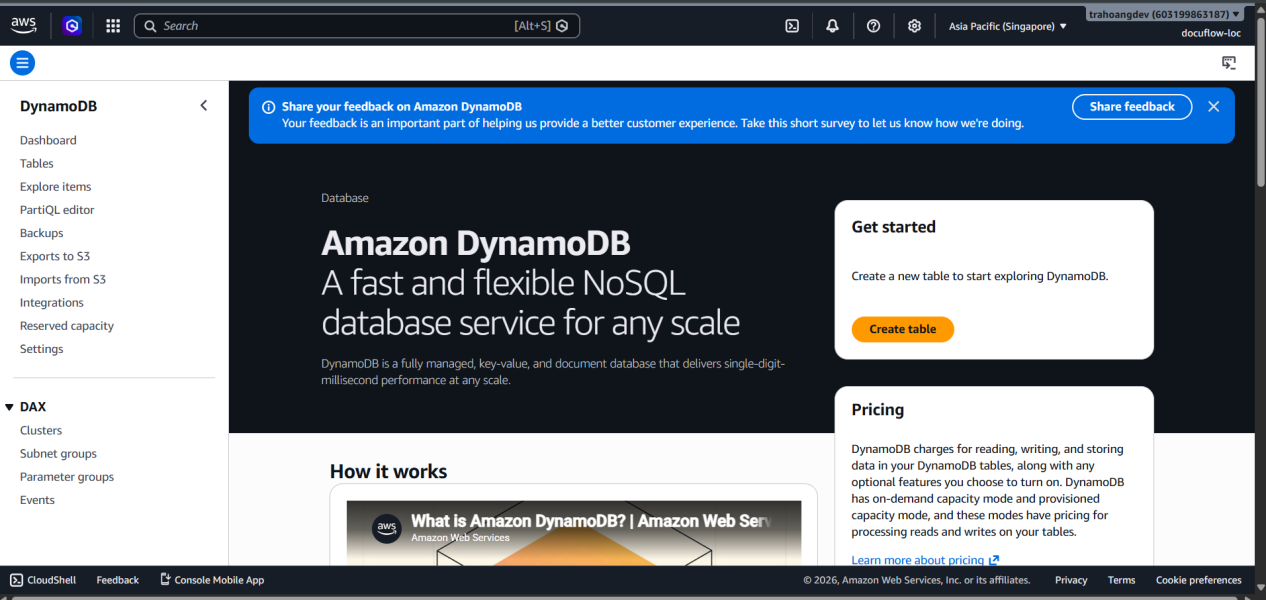
- Create a new table: On the left menu, select Tables, then click the Create table button.
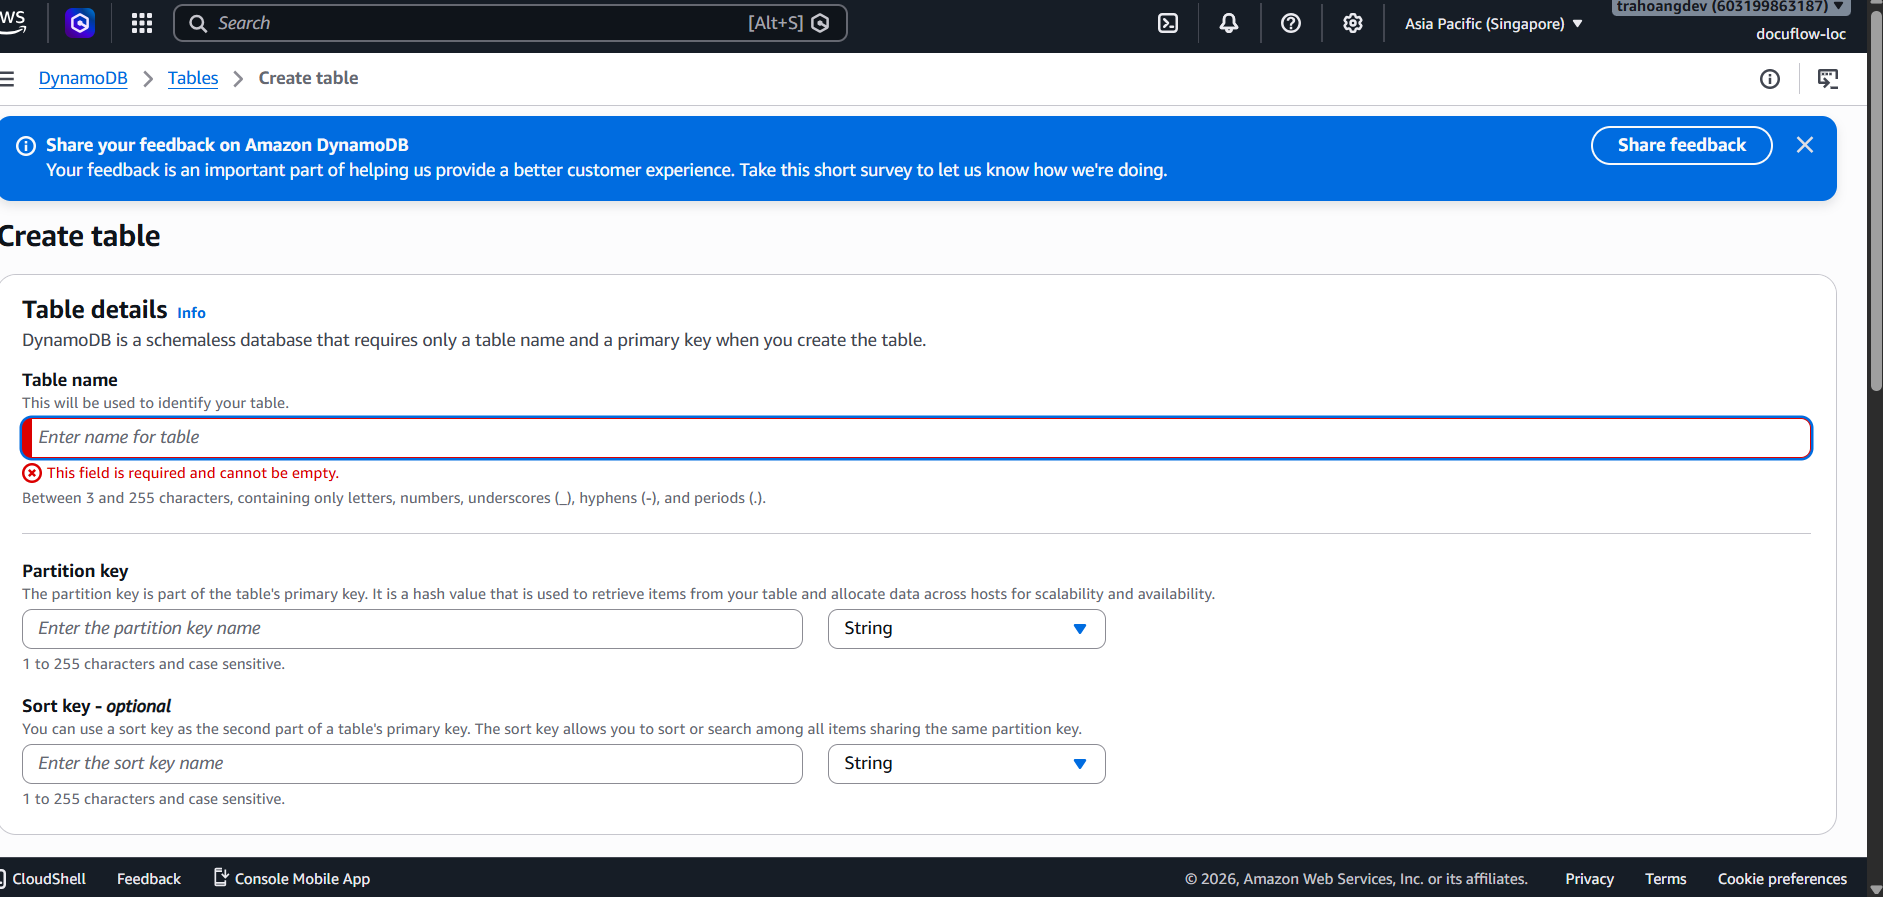
- Configure the primary key (Table details):
- Table name: Enter
docuflow-dev-documents-table. Or another name based on your established requirements.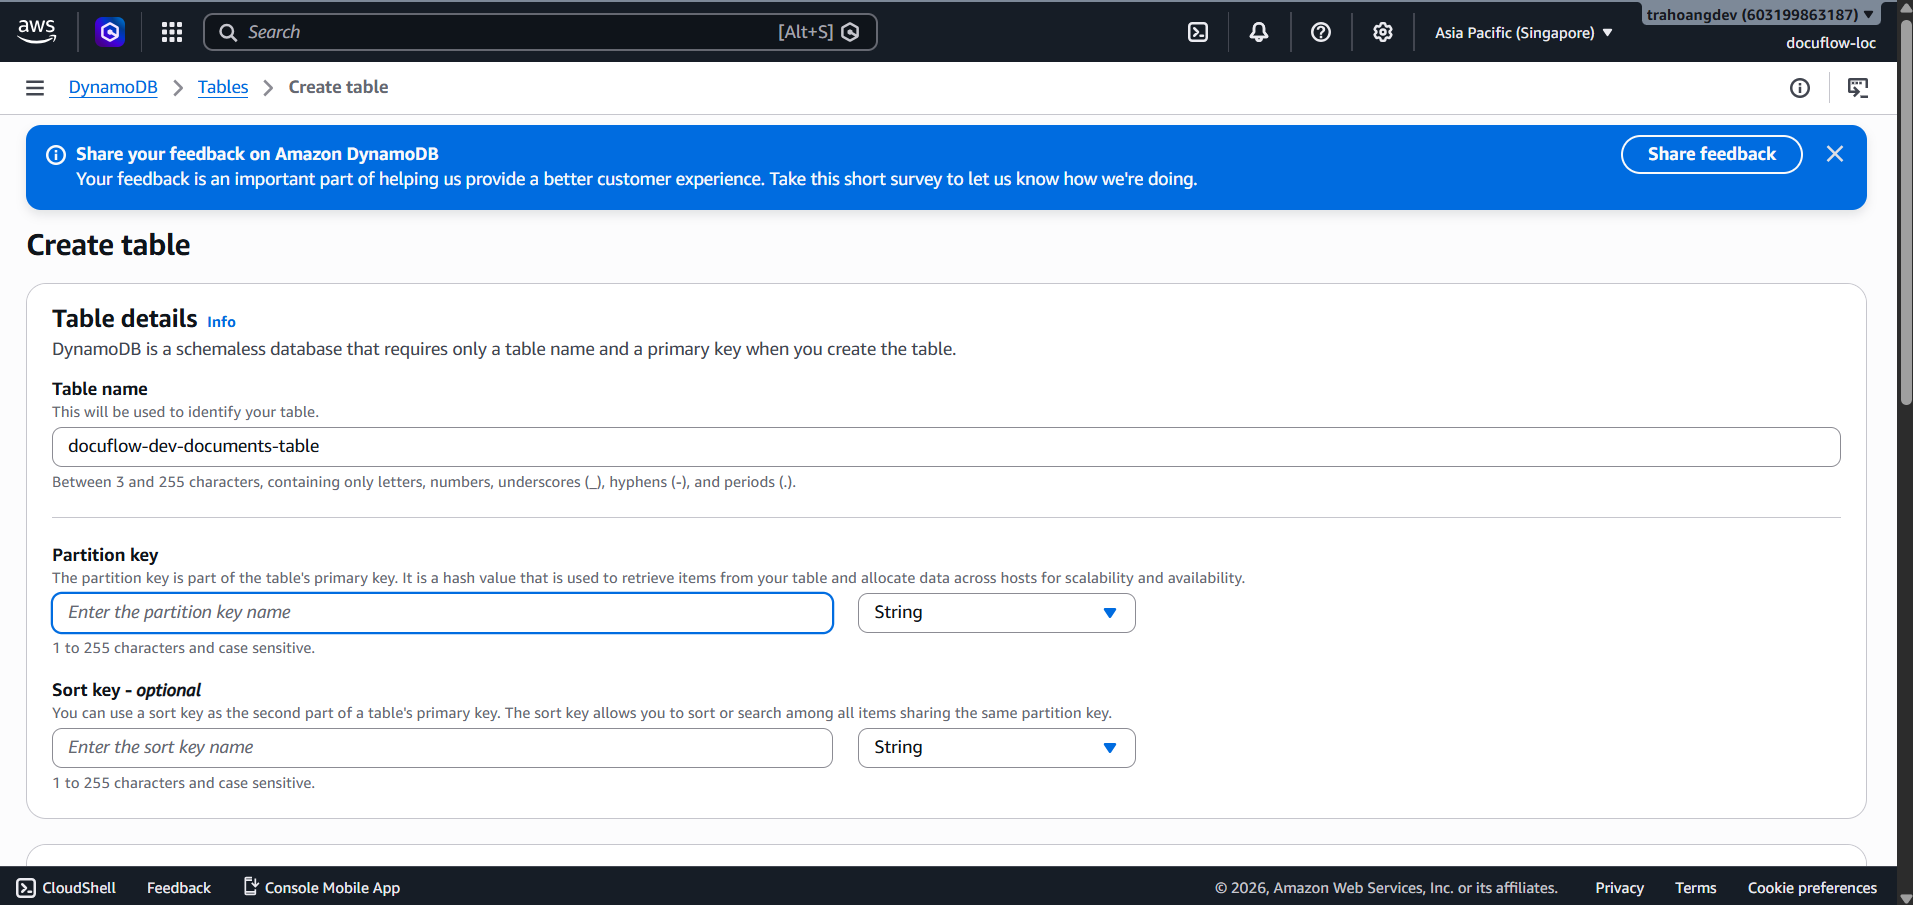
- Partition key (the main key to find data): Enter
PKas the field name and chooseStringas the data type next to it. (Additional explanation: In reality, this field will store data in the form ofUSER#{userId}to group all documents of 1 user into one place).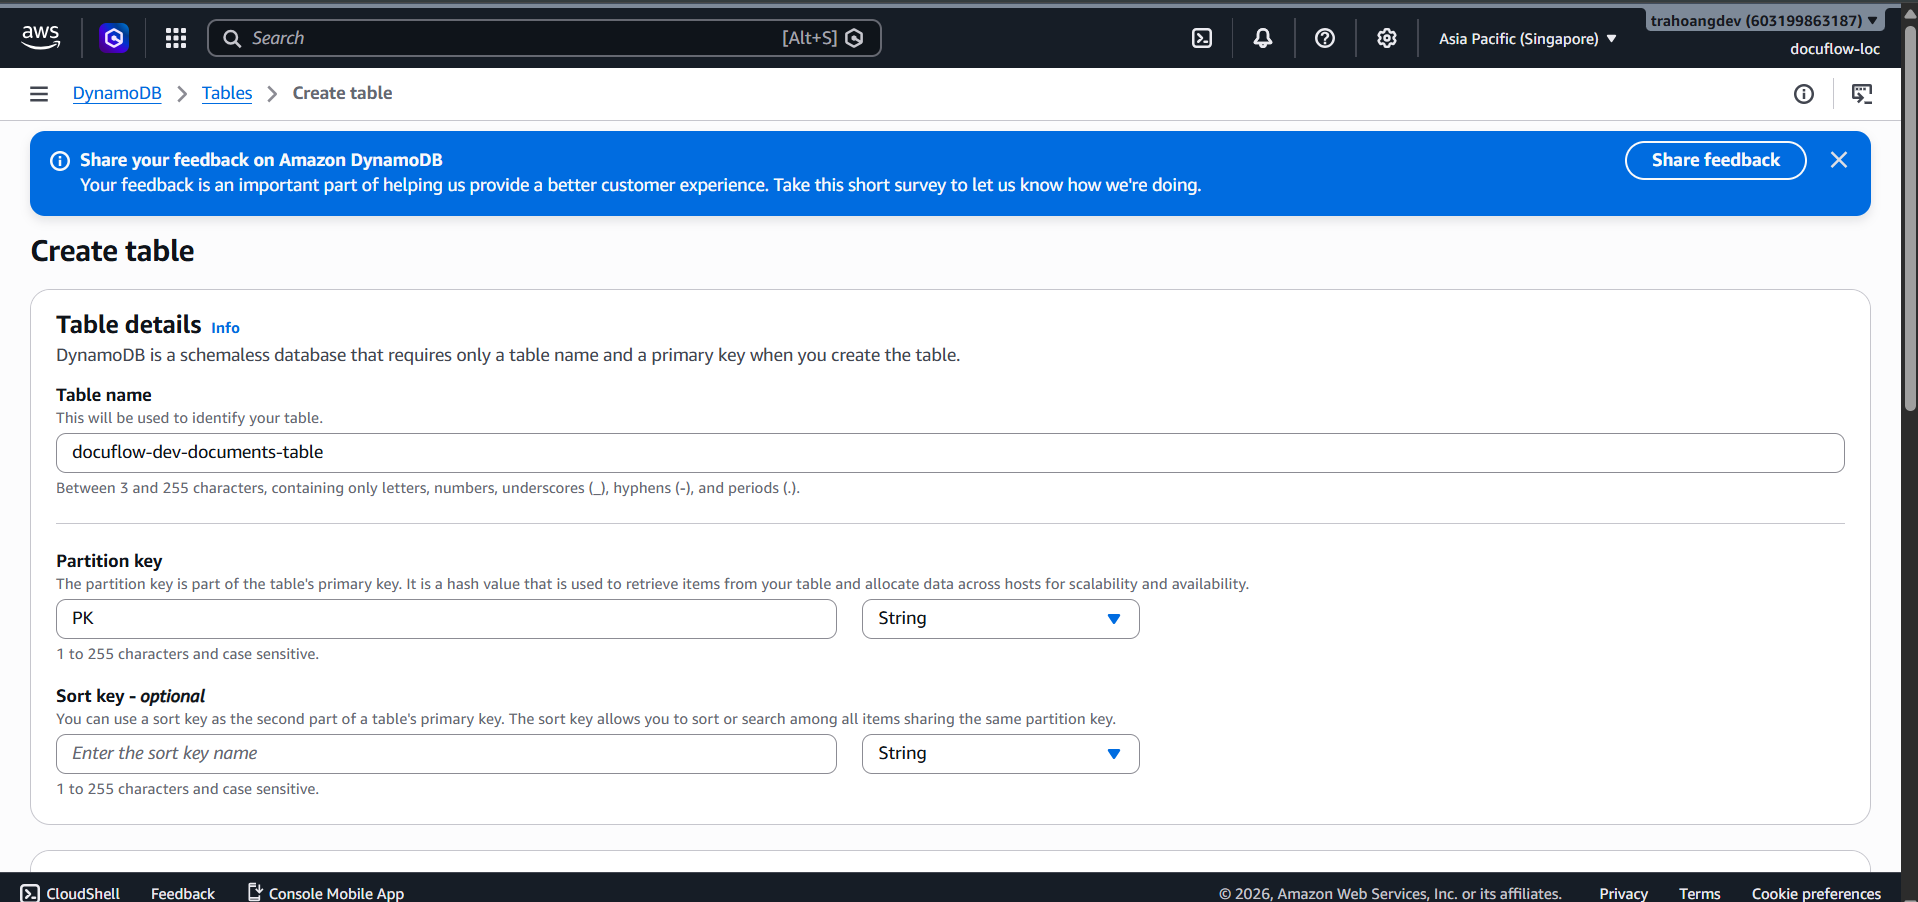
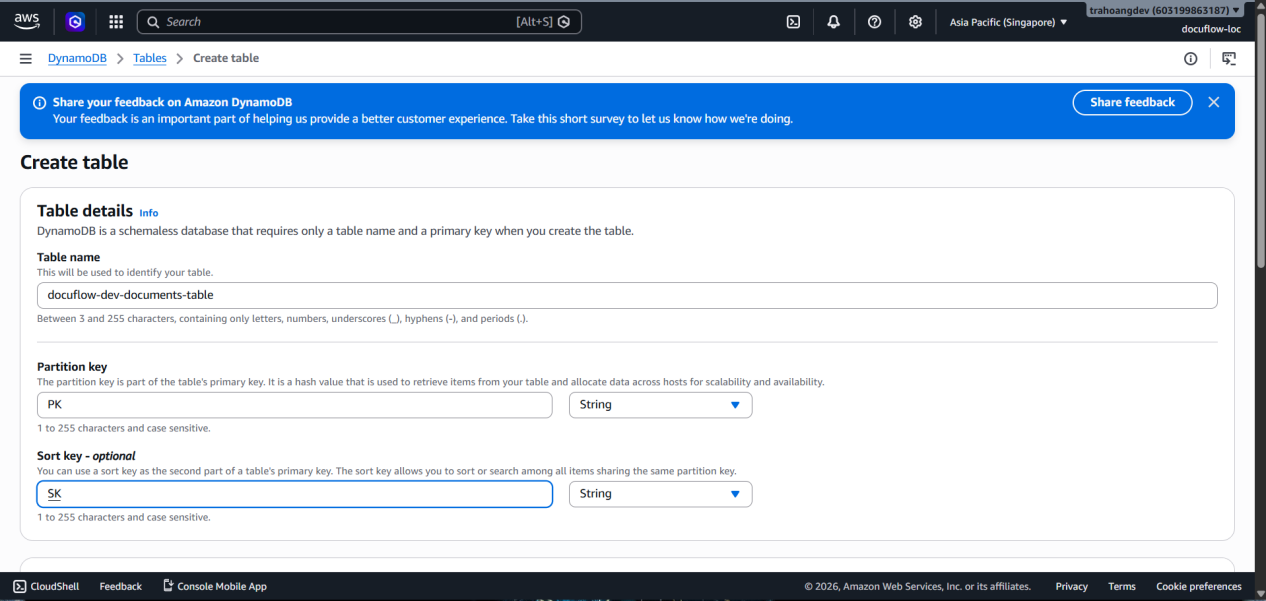
- Sort key (the secondary key): Check the Add sort key box. Enter
SKas the field name and chooseStringas the data type. (This field will be stored in the form ofDOC#{documentId}to distinguish documents of the same user).
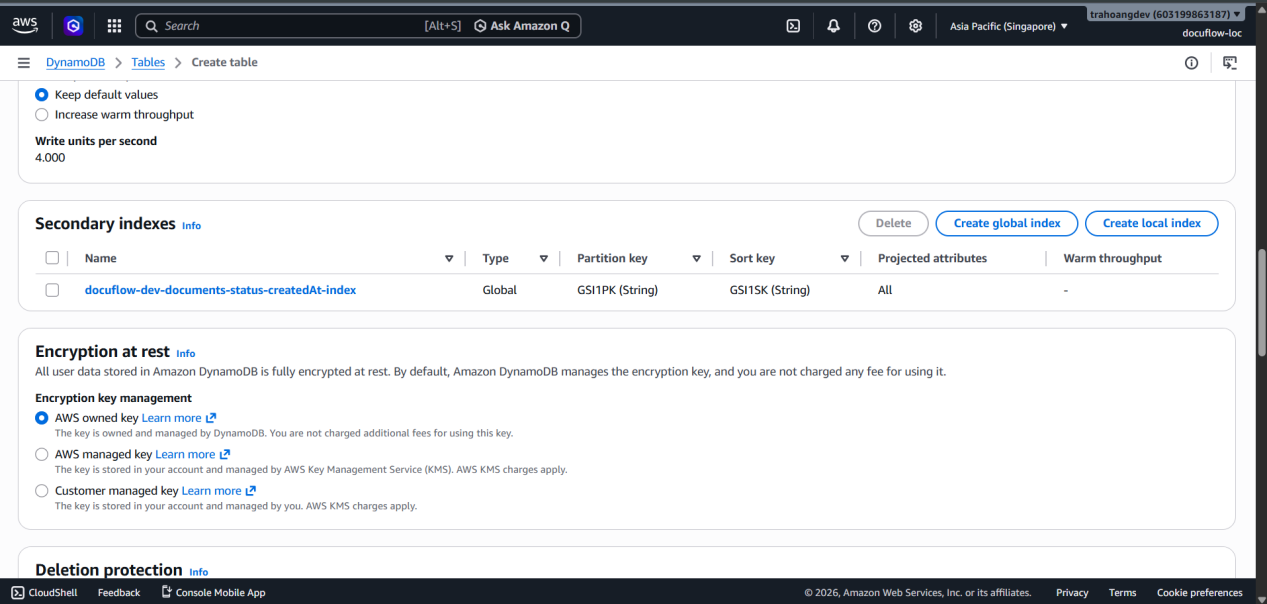
- Configure Global Secondary Index (GSI): Why do we need a GSI? If you want to find documents by “Status” (e.g., finding failed documents) instead of by “User”, you need to create a secondary search index called GSI.
- Scroll down to the Table settings section, switch from Default settings to Customize settings.
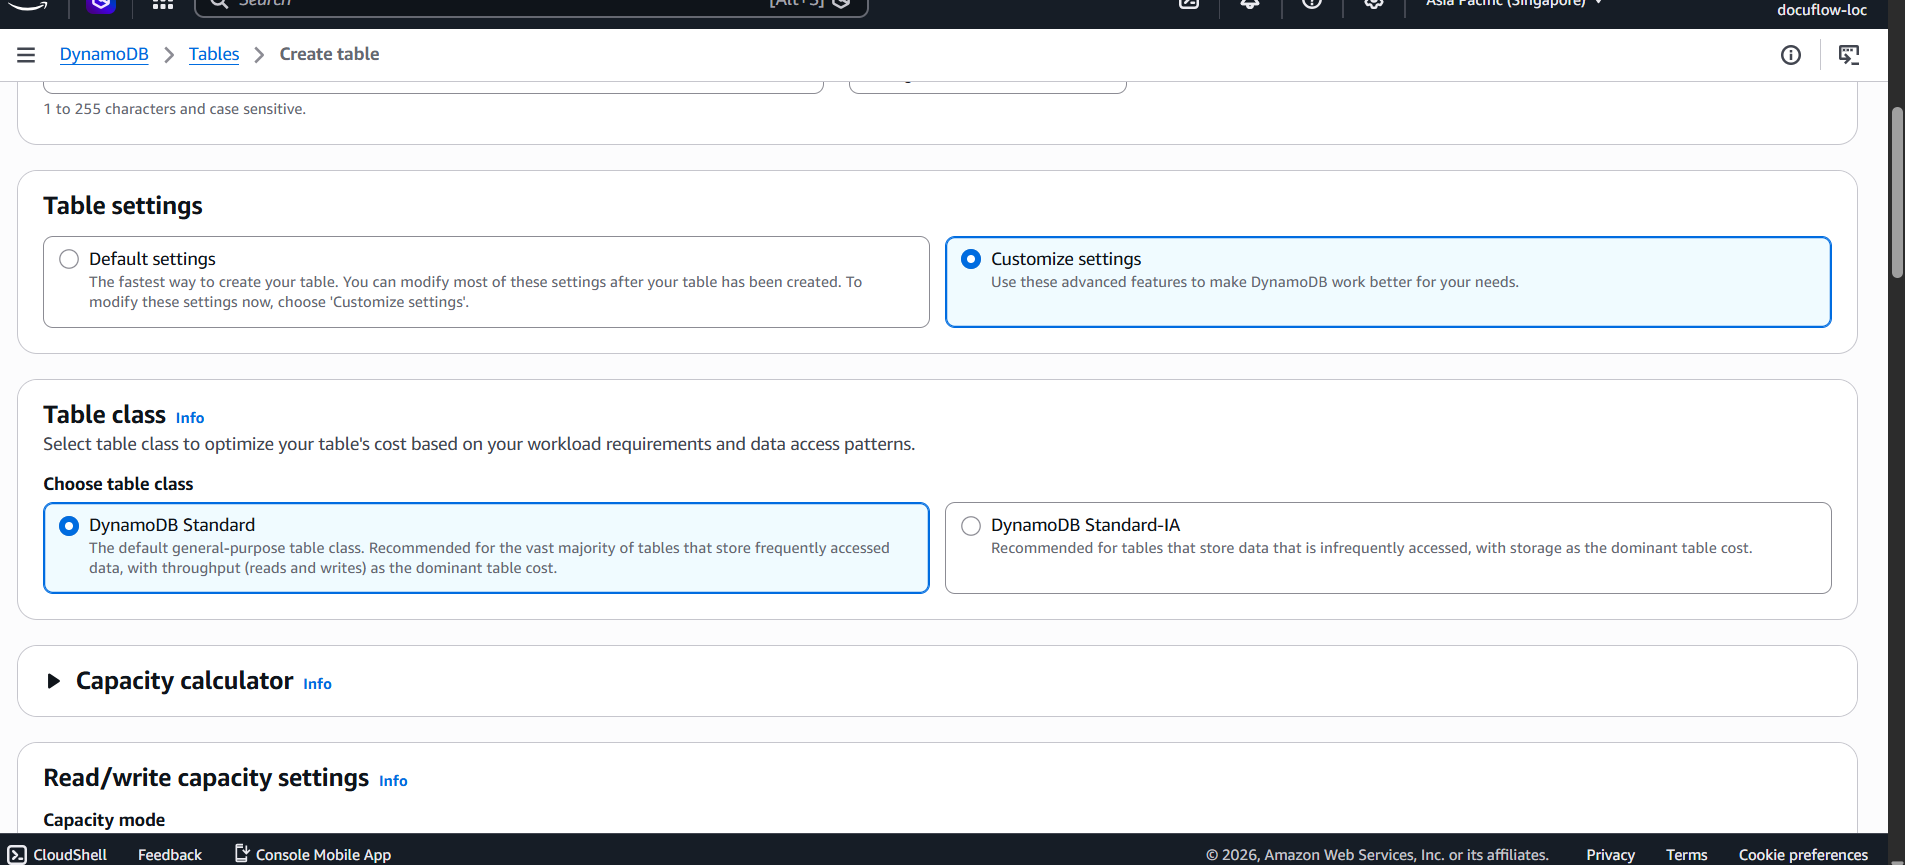
- Scroll down to the Secondary indexes section and click Create index.
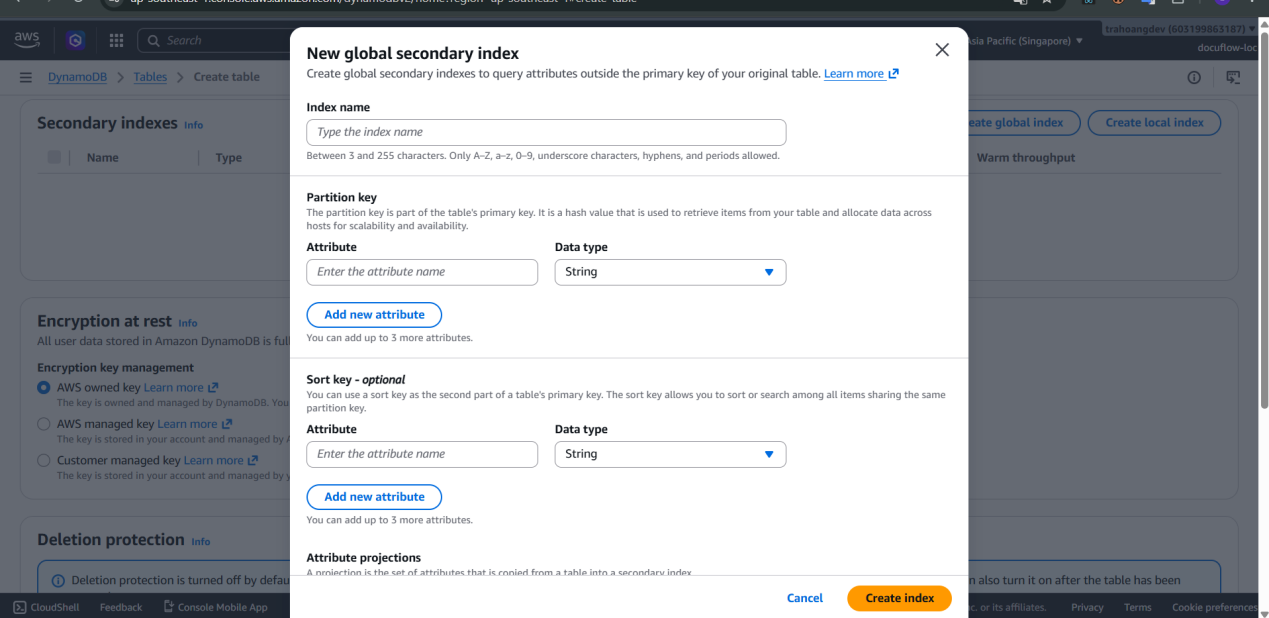
- Partition key (of the Index): Enter
GSI1PK(Stringtype). (The actual stored value will beSTATUS#{status}).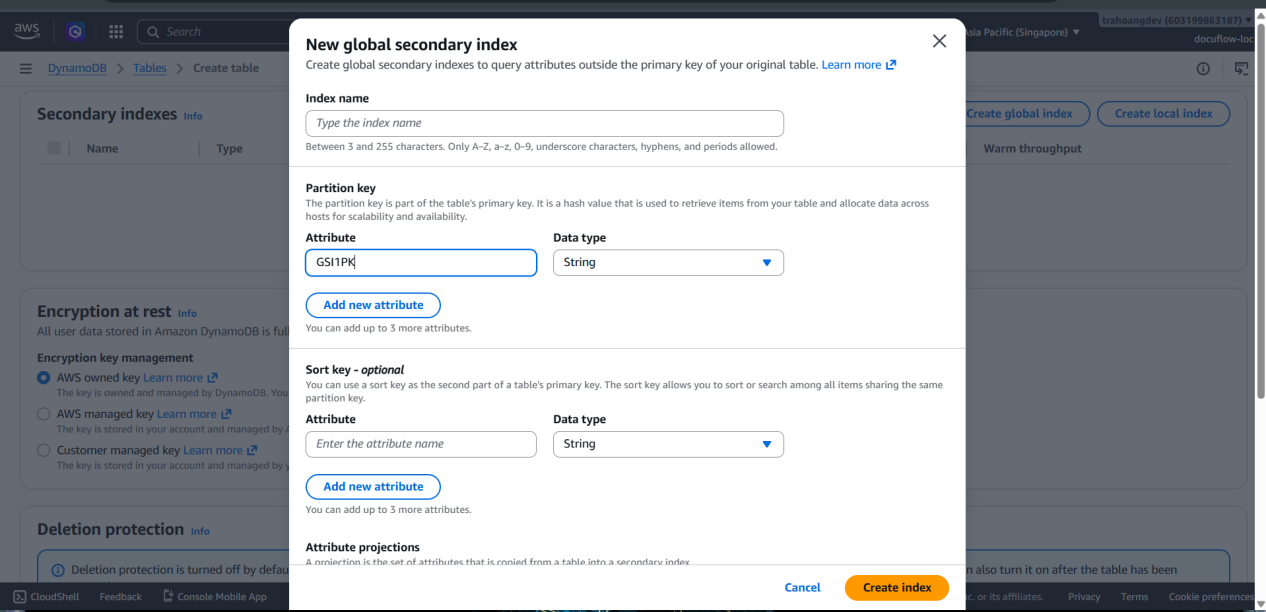
- Sort key (of the Index): Enter
GSI1SK(Stringtype). (The actual stored value will be thecreatedAttimestamp field).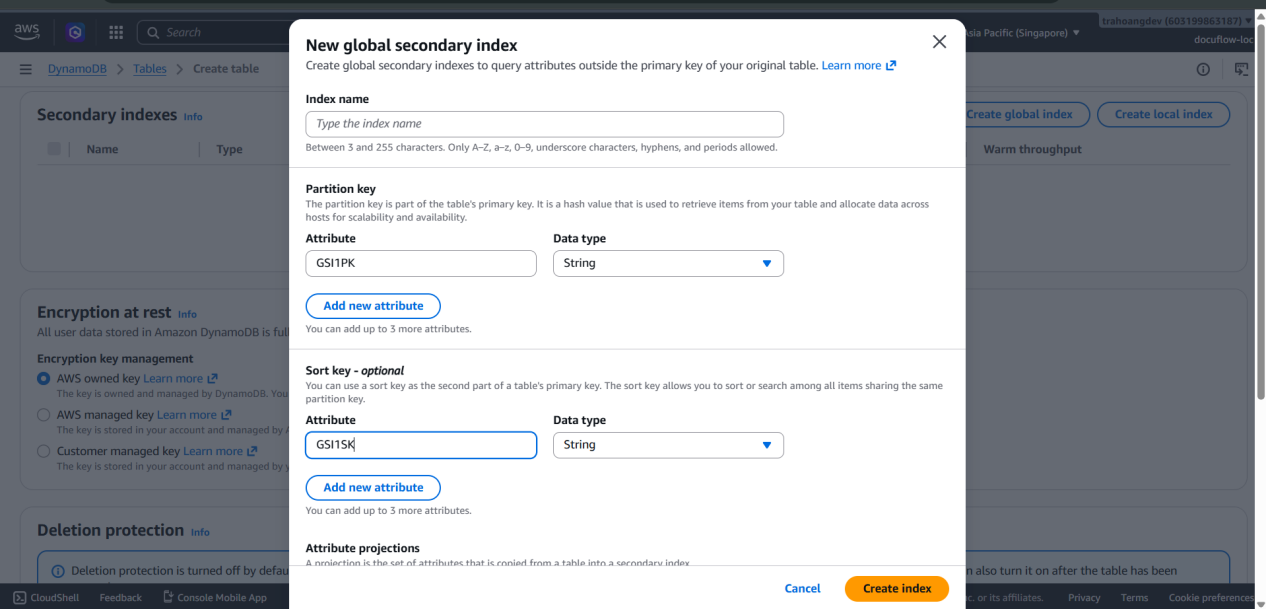
- Index name: Change it exactly to:
docuflow-dev-documents-status-createdAt-index. Or based on your established requirements.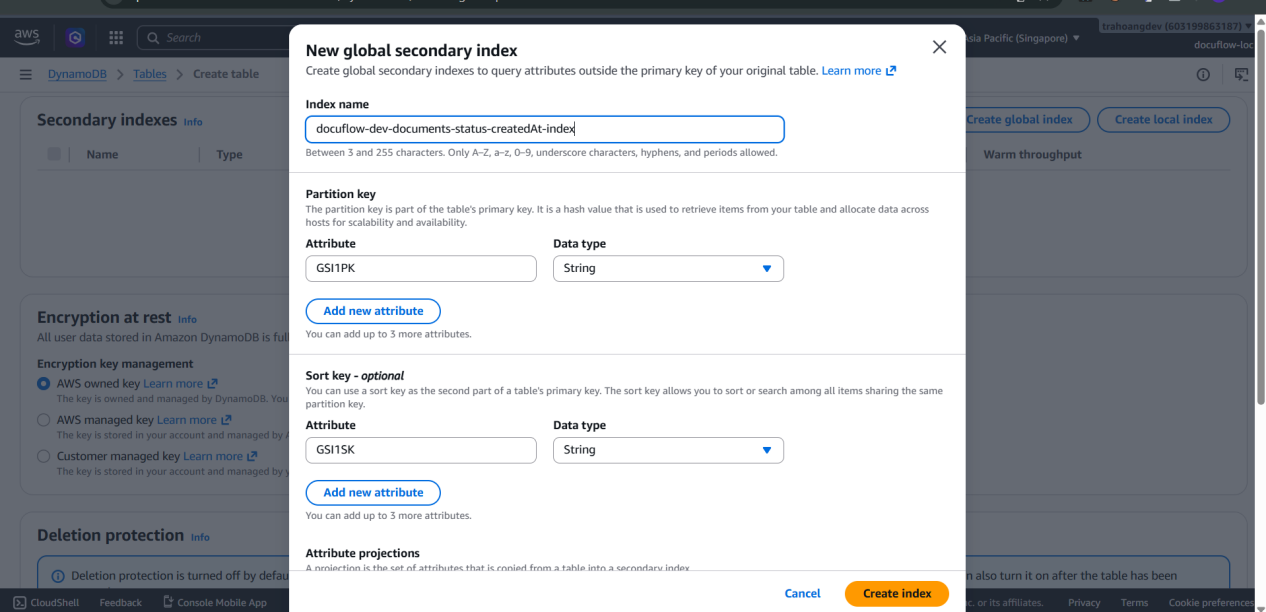
- Attribute projection: Select All to ensure all necessary data is returned to the Frontend when searching by status.
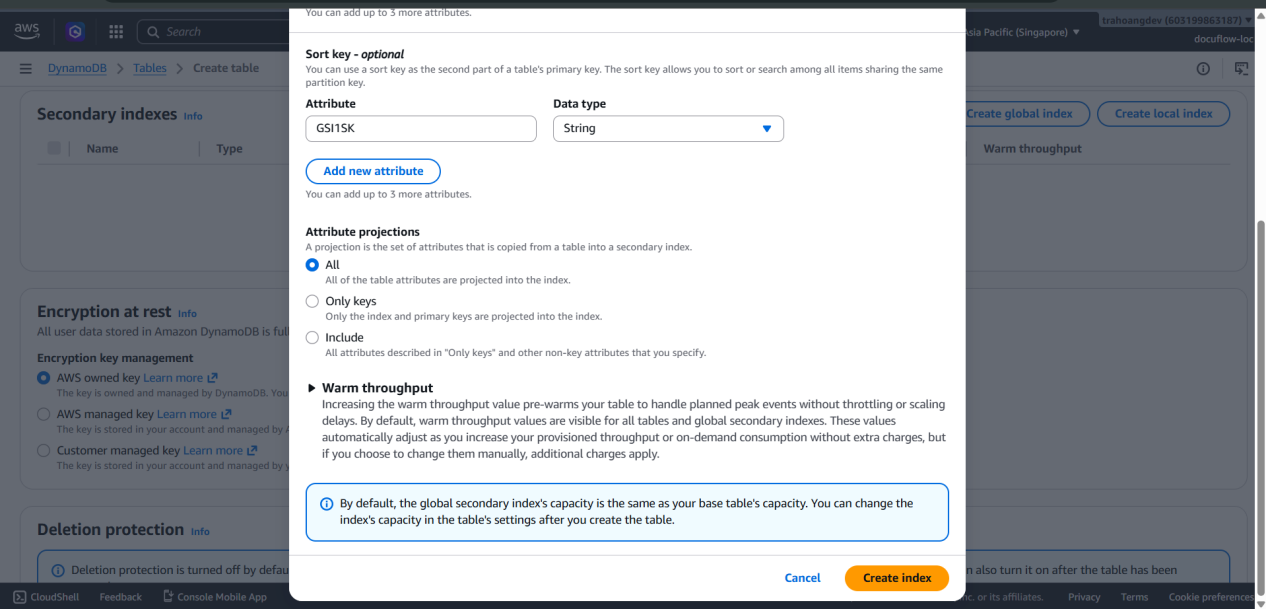
- Click Create index to confirm the index configuration.
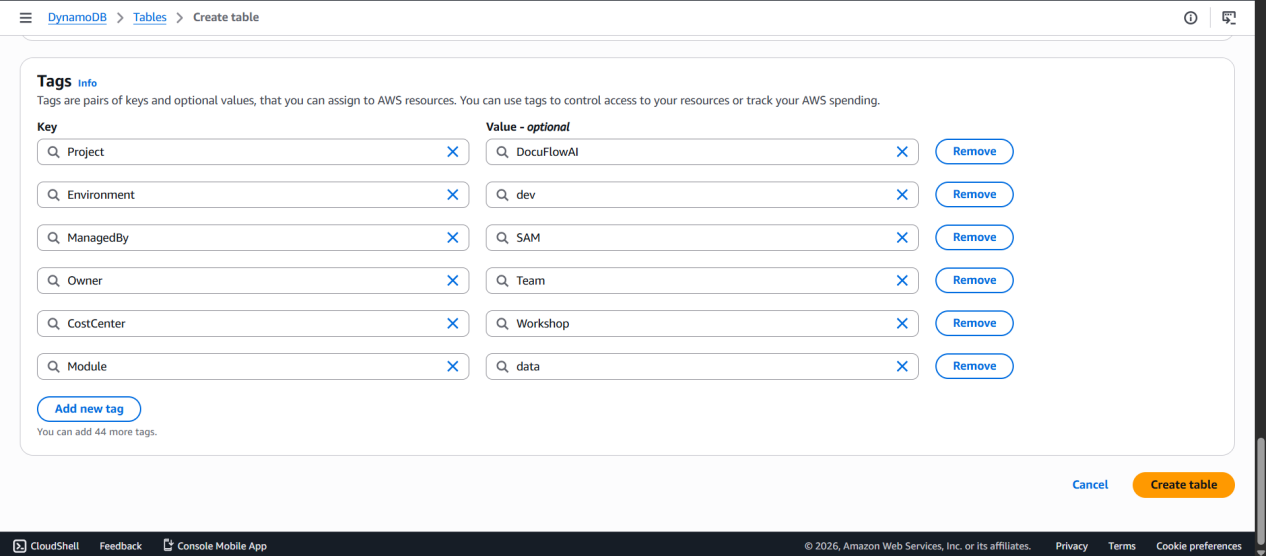
- Add Tags to configure and help easily manage the project:
 6. Finish creating the table:
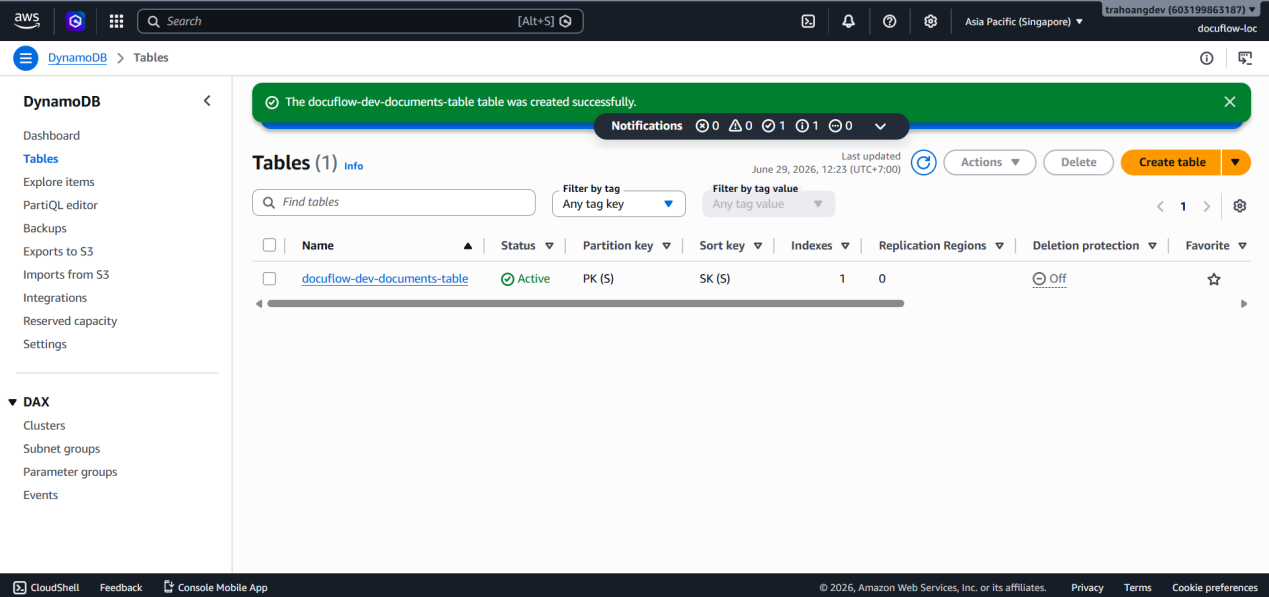
Keep other default configurations unchanged, scroll to the bottom of the page and click Create table. The system will take about 1-2 minutes to create the table and index.
6. Finish creating the table:
Keep other default configurations unchanged, scroll to the bottom of the page and click Create table. The system will take about 1-2 minutes to create the table and index.